Working with Lights, Sensors, Zones, and Scenes
Editing a Light or Sensor Setting
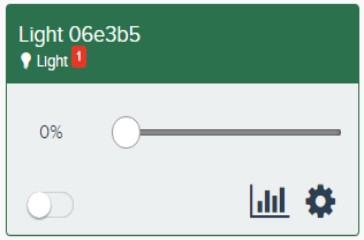
To edit a light or sensor, search for the corresponding panel on the SimplySNAP dashboard, and click the Gear icon in the lower right corner of the panel.
NOTE: Using the search field provides an efficient way of finding the specific light or zone of interest. Simply start typing any unique identifiers for the light or zone and the display will immediately update with the relevant results.
NOTE: When editing a light, it can be positioned or repositioned on the Map view by dragging and dropping it on the map view on the right of the Edit Light page.
Editing Zone Settings
To edit a Zone's settings, click the Gear icon in the panel for the zone you wish to edit.
Adding Lights to Zones
A light can belong to multiple zones, and will be affected by each command issued to any zone that the light is a member of. Adding a single light to a zone can be accomplished from the panel of the corresponding light or zone. If you plan to add multiple lights to a zone, it's easiest to accomplish from the panel for the zone.
If you need to add lights to a number of zones, it may be easier to import a .CSV file. For more information on doing this, see Backing up and restoring a system configuration
To add a light to a zone using the Light Panel:
- Click the Devices & Zones icon in the left menu bar.
- Locate the panel for the light you wish to add to a zone, and click the Gear icon in the lower right of the light's panel.
- Click the Select Zones button and select the zone(s) that you'd like to add the light to.
NOTE: A light may belong to up to eight zones.
- Click the Save Changes button at the bottom of the screen to complete the changes, or the Cancel button to exit without saving.
To add lights to a zone using the Zone Panel:
- Click the Devices & Zones icon in the left menu bar.
- Locate the panel for the zone you wish to add a light or lights to, and click the Gear icon in the lower right of the light's panel.
- Click the Select Lights button and select the light(s) that you'd like to add to the zone.
- Click the Save Changes button at the bottom of the screen to complete the changes, or the Cancel button to exit without saving.
Deleting a Light or Sensor
To delete a light or sensor, click the Gear icon on the light or zone you wish to delete to load the Edit screen. Within the Edit screen, click the Delete Light button in the upper right of the content area.
NOTE: An unconfigured or deleted light will still respond to Zone - All commands.
Deleting a Zone
You can delete a zone by clicking the Devices & Zones menu choice in the left menu panel, and then clicking the Gear icon for the zone you wish to delete. When the window appears, click the Delete Zone button in the upper right of the screen and then click the Delete Zone confirmation button.
Editing a Scene
To edit a scene, click the Scenes menu choice in the left menu bar, then click Edit Scene next to the scene you wish to edit.
Deleting a Scene
To delete a scene, click the Scenes menu choice in the left menu bar, click the Gear icon next to the scene you wish to delete, then click the Delete Scene button.
NOTE: Making changes to several lights at once can cause certain lights to be unresponsive during the update. This is a short term situation that doesn't last long. An animated icon will be displayed on the Devices & Zones page during the update process.