You're reading: SimplySNAP Online Help > Basic Site Configuration > Configuring Lights, Sensors, Zones, and Scenes > Adding Sensors and Switches
Adding Sensors and Switches
Sensors and switches contribute to the "intelligence" of your lighting system. With sensors in place your system will be able to respond to events such as a person entering or leaving the area. Switches can act as a manual way to activate lights without needing to log in to the SimplySNAP interface.
To add a sensor or switch access the SimplySNAP dashboard and then click the Devices & Zones menu choice in the Left Menu Bar.
To add a new sensor or switch:
-
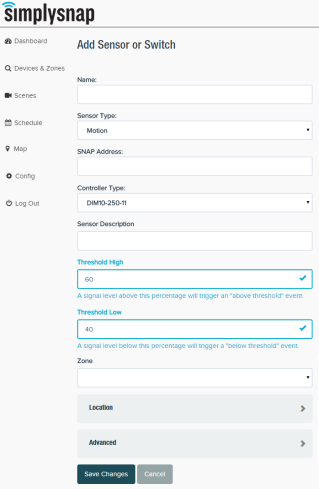
 Click the Add Sensor Icon near the top of the page.
 - Enter the desired name for the sensor or switch, the SNAP Address for the lighting controller the sensor or switch is attached to, and the controller type into the provided fields. You'll also need to select a sensor type from the Sensor Type drop-down list.
- In the Zone field, enter the Zone that the sensor will affect.
NOTE: A zone can only have one photocell sensor.
- Steps 2 and 3 are required as a minimum. Other information may be entered as desired including a description and location. The Threshold High and Threshold Low fields are used to fine tune the sensitivity of attached sensors, but only for cases of weak sensor response. Most sensors work fine with default settings.
-
 Click the Save Changes button to save, or the Cancel button to exit without saving changes.
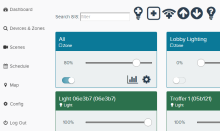
 - On a successful save, an orange sensor panel for the newly added sensor will appear in the content area of the dashboard.
- At this point you'll need to configure how the sensor will control your lighting. Click the Devices & Zones menu choice in the left menu panel, then click the gear icon for the zone where you placed your sensor.
- Click the Behavior drop-down and select the Behavior that corresponds to your desired control mode, then click the Save Changes button to save, or the Cancel button to exit without saving changes.