Scheduled Events
 Scheduled events provide a great deal of flexibility to your lighting operations. The schedule is defined through events, which are scheduled instructions for activating a behavior at a specified time, within a specified zone. Events can be configured for any time of the day on any day or days of the week.
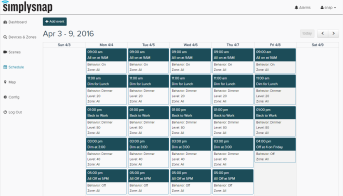
Scheduled events are performed from the Schedule content area which is accessed by clicking the Schedule icon in the left menu bar.
Adding an Event
Events are scheduled times for lights or zones to be switched on, off, or dimmed.
To add an Event:
- Click the Schedule icon in the left menu bar. This will present a calendar showing currently scheduled events.
- Click the Add Event button to load the Add Event window.
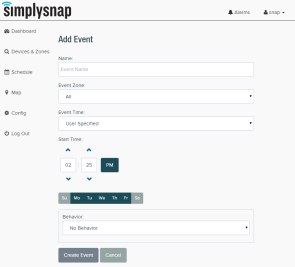
- Enter a name for the event in the provided field.
- Select the Event Zone for this event. This is the zone that will be affected at the event time.
- Enter the time you want the event to trigger. This can be a specific time that is entered using the Start Time clock, or a less specific time such as dawn, noon, or dusk, entered using the Event Time drop-down. Note that if you're using a less specific time you'll be given the option to input a positive or negative offset in minutes. This will allow you to schedule events for times like "Five minutes before sunset" or "Eight minutes after noon."
If you are scheduling an offset, events happening before the selected event time are entered as a negative number, while times after the selected event are entered as a positive number.
NOTE: We recommend that you schedule more time sensitive events to occur at least 3 minutes before the desired time to allow adequate time for changes to propagate through the SimplySNAP system.
- Use the day of the week buttons to select the days on which this event will trigger.
- Use the behavior drop-down to select the behavior that will trigger when the event occurs.
- Click the Create button to create the event, or click the Cancel button to close the Add Event window without saving the event.
Editing an Event
You can edit any event in the Schedule view by clicking the event you wish to edit, making the desired changes, and clicking the Save Changes button to confirm the changes or Cancel to exit without making a change.
Deleting an Event
To delete a scheduled event, access the Schedule view using the Schedule icon in the left menu panel, and click the scheduled event you wish to delete. You will be prompted for if you wish to Delete the event or Cancel the delete action.
Event Overrides
If you're adding or changing an event, and the new event occurs simultaneously with a previously scheduled event, the new event will appear greyed out in the calendar with an (Overridden) label next to the time of the event. This will persist until edits are made to get the two events out of conflict.