SimplySNAP Demo Kit Quick Start Guide
This SimplySNAP Demo Kit demonstrates complete control of lighting fixtures using the SimplySNAP Lighting
The kit has a built in LED Light and supports an external light fixture for demonstration purposes. Just follow the instructions below for a quick and simple demonstration of controlling a light.
A complete SimplySNAP user guide is available at: http://help.synapse-wireless.com/Lighting.
Kit Contents
- Quick Start Guide
- Site Controller (SS420-002)
- Demonstration Light (included in Kit)
- DIM10-250-11 (for controlling customer fixture)
- 6 Foot Power Cord
- Screwdriver
- DIM Wires for External Fixture
- Inside the storage compartment (for show and tell)
- DIM10-100
- TL5
Section 1: Controlling the Built-in Light
Part 1: Applying Power
- Plug the power cord into the male power plug next to the switch.
- Use the switch to turn on the power.
NOTE: If you want to use a customer light fixture, refer to Section 2. Before installing a customer light fixture, validate everything is working by going through Section 1.
Part 2: Connect to the SimplySNAP Site Controller
When you select the SSID and your computer attempts to connect to the site controller, it will prompt you for a password to complete the connection.
 Each site controller broadcasts a Wi-Fi SSID that will be visible from the network connections panel of your computer or tablet.
It will appear in your device's network connections list as
When you select the SSID and your computer attempts to connect to the site controller, it will prompt you for a password to complete the connection.
Enter the default Wi-Fi password (labeled "WiFi Password) provided on the sticker to establish the connection.
When this password is entered a connection is established and will appear in your network settings. This may also appear as an “Unidentified network” with no internet access.
Part 3: Log into SimplySNAP
- Once the connection is made open a Google Chrome browser and type the following in the address bar: 192.168.55.1.
NOTE: Internet Explorer is not supported.
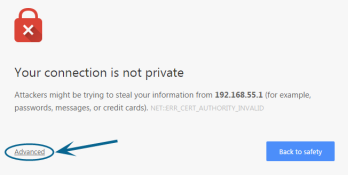
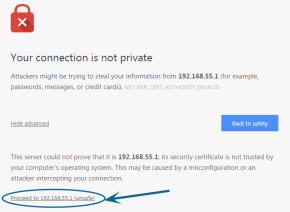
- You may receive a warning message about the connection not being private. If so, click the “Advanced” link and then click “Proceed to 192.168.55.1 (unsafe)” to continue to the SimplySNAP user interface.
- The default user name for SimplySNAP is: snap and the password is labeled User on the sticker on the side of the unit.
NOTE: User name and password are case sensitive.
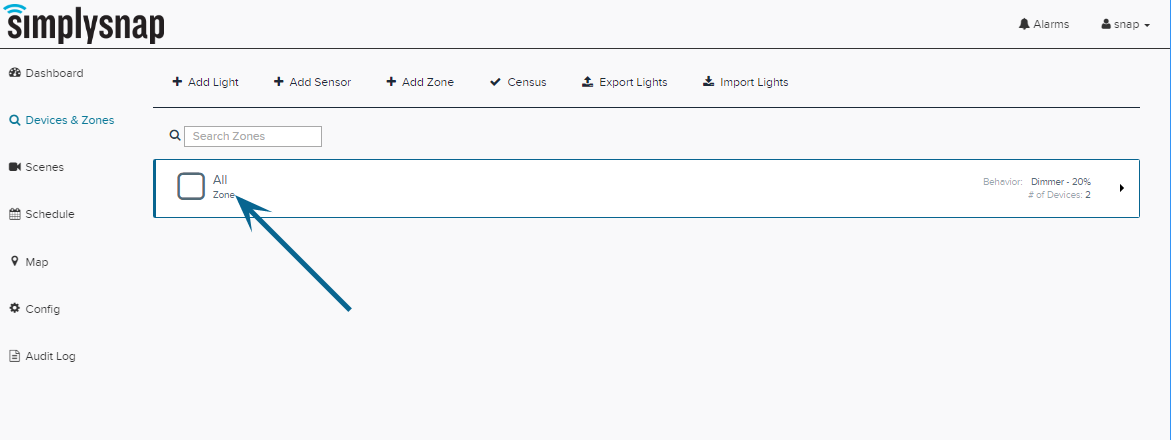
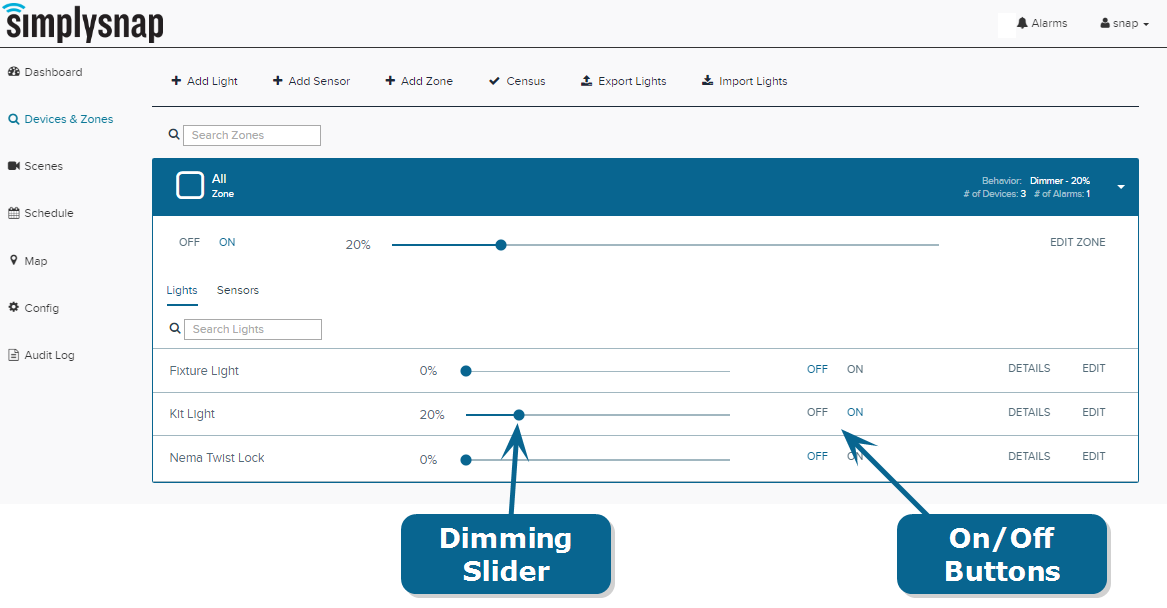
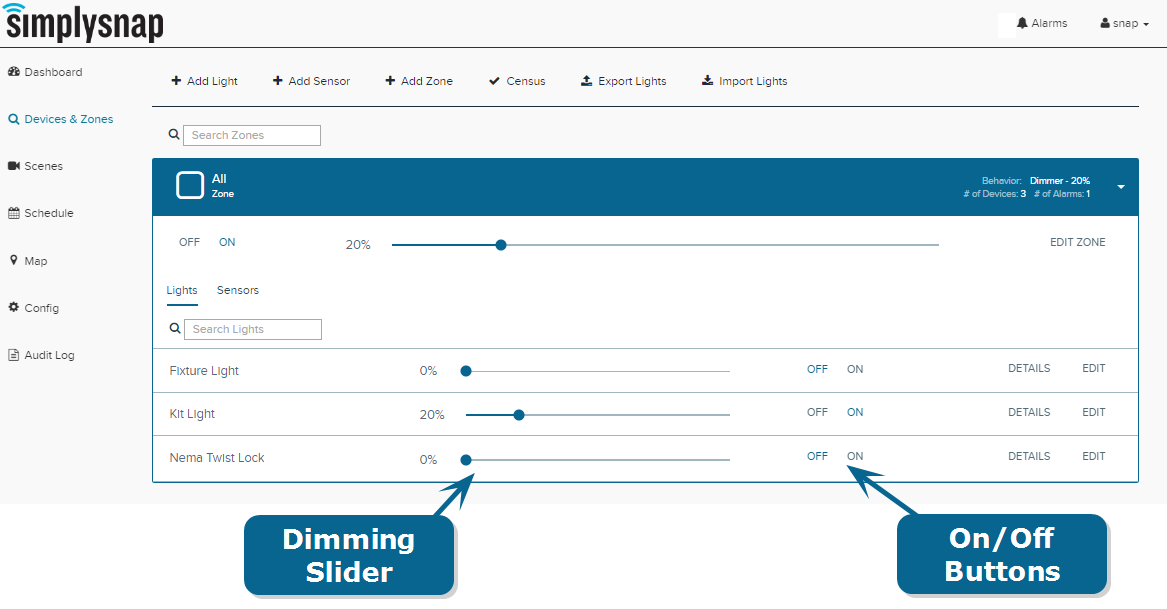
- Congratulations! You should now be logged into SimplySNAP. You should have landed on the “Devices & Zones” page. (If not, go ahead and click the Devices & Zones link on the left-hand side of the screen.) Go ahead and click the ON/OFF button to toggle the light state or use the slider to dim the light.
Section 2: Using a Customer Light Fixture with SimplySNAP
The second lighting controller is a DIM10-250-11 which can be used to control a customer’s light if desired.
- Turn off power to the kit.
- Plug the customer’s light fixture power cord into the female 3-prong power socket.
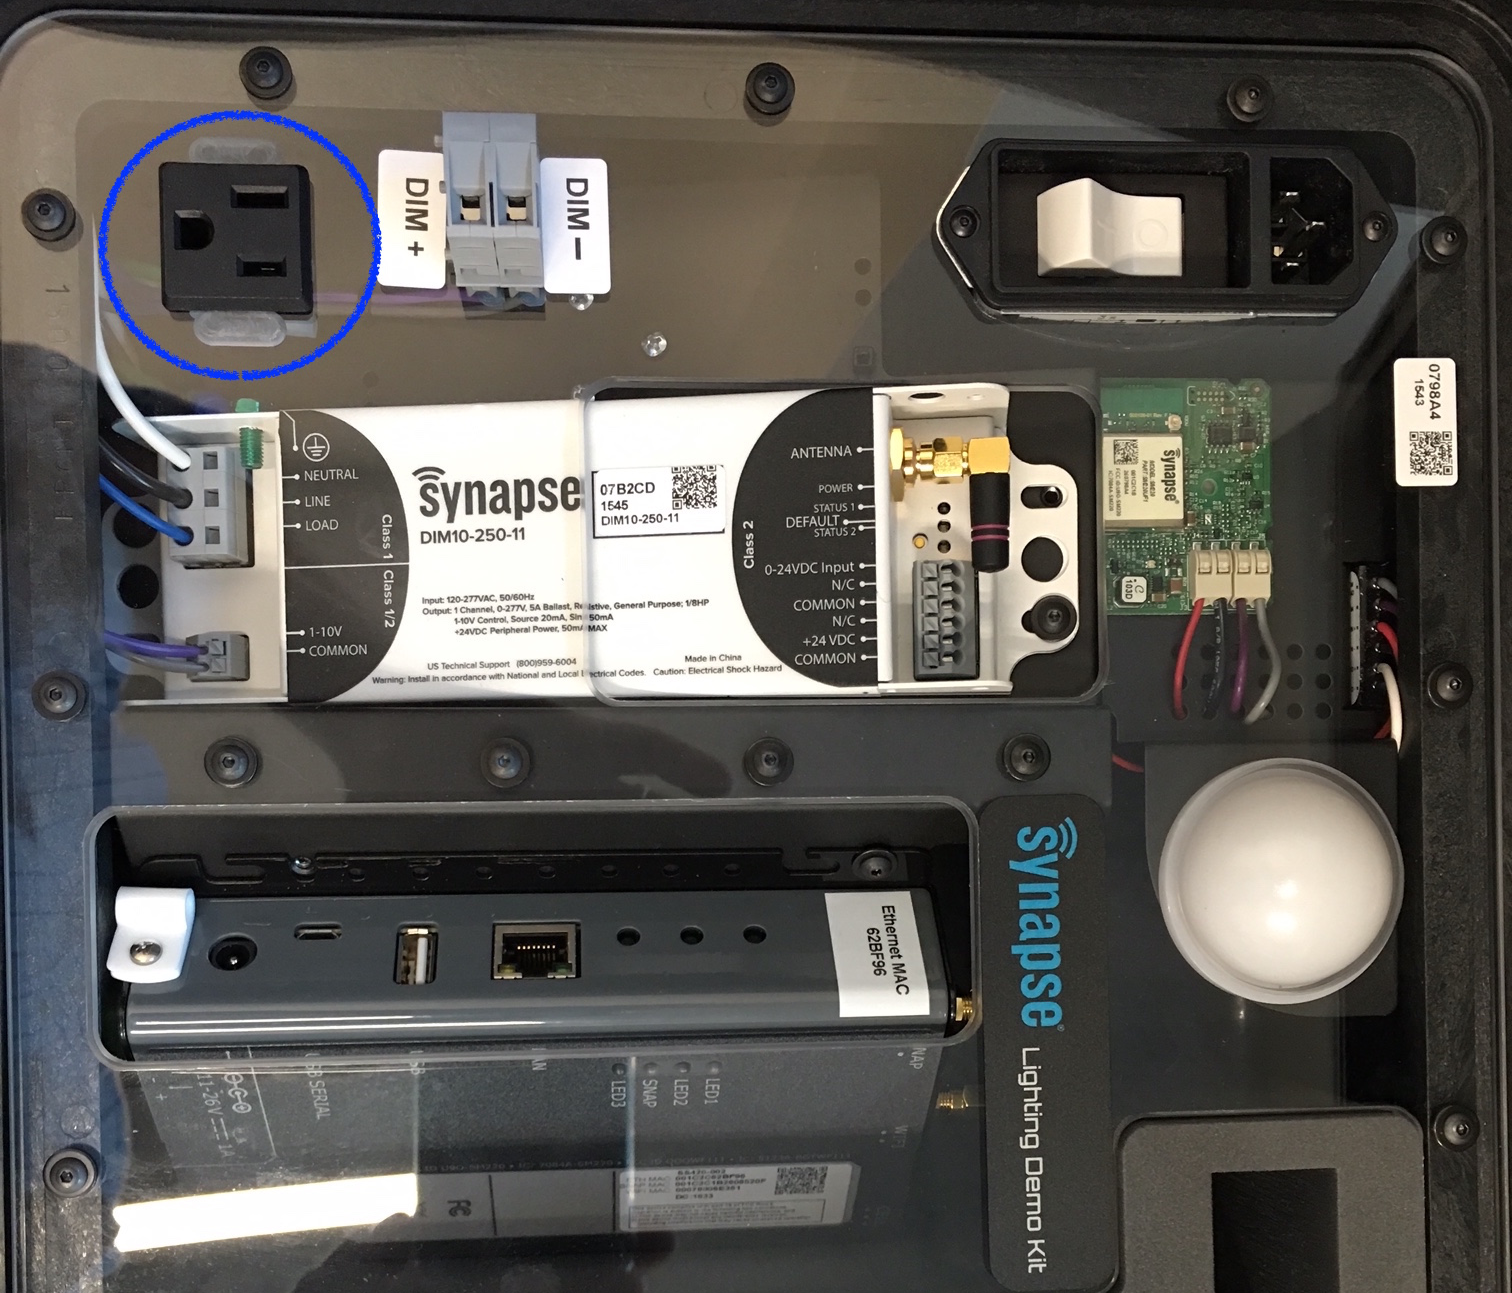
- Use the purple (DIM+) and gray (DIM-) wires provided (in the accessory pouch) to connect your dimming wires.
- Turn on the power to the kit.
- Log into SimplySNAP using the instructions from section 1.
- Now you should be able to control the “fixture light” in SimplySNAP.
Section 3: Using the TL5-B1 on a fixture with a NEMA-7 socket with SimplySNAP
The third lighting controller is a TL5-B1 which can be used to control a customer’s light if desired.
- Make sure the fixture with the NEMA Socket is not powered.
- Attach the NEMA socket to the customer fixture by inserting and twisting.
- Do not plug the fixture into the kit. Power the fixture from a wall outlet.
- Turn on the power to the fixture with the NEMA socket.
- Log into SimplySNAP using the instructions from Section 1.
- Now you should be able to control the “Nema Twist Lock” in SimplySNAP by dimming and the ON/OFF buttons.
For more information about Synapse lighting controls please visit:
http://www.synapse-wireless.com/iot-products/lighting-controls/